In 2005 I was trying to decide what to do as a hobby next when I came across the website Lumenlabs. It was a site for building your own projector. Now, why would you want to do that? Well other than for the love of building something, at the time projectors were very expensive. And a 1080p projector was anywhere from $6,000-$20,000 . So I decided to give it a try:
This is how it all started, as a basic 15″ Projector.
September 24, 2005
My parts list :
HP L1530 LCD Monitor
Slusher Box from slusher357
Light kit from LL (Ushio S400DD, Ballast, Base Mogul)
Lens Kit from LL (Fresnels and Triplett)
2 – 120m fans from Radio Shack
Lexan XL10 from Home Depot
400watt Light from Home Depot ( more on that later)
And lot’s of wires, switches, screws, wood, etc from Radio Shack and Home Depot.
And here’s the box from slusher357

Here are some pics of the LCD before and after stripping :


September 24, 2005
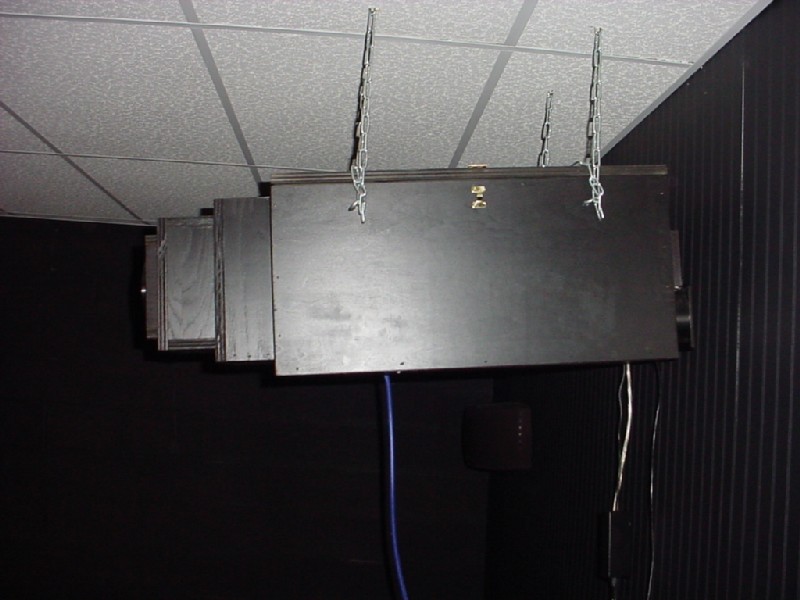
Here’s the inside of the box with some assembly done:


And here’s a shot of the back of the box :

And here’s a picture of what this baby can do :

And then it all changed
October 7, 2005
Well, I was trying to straighten up the LCD and Fresnels and I tightened a screw too far and cracked the LCD..
But that just made it that much easier to buy the Sharp 15.4″ WUXGA Screen and a Controller Kit.

January 15, 2006
I have the 15.4″ Wuxga installed. I’m just using the standard LL triplet and fresnels until the Pro Lens kit comes in. I’m projecting at 720p from a Samsung Dvd player. The screen is 2 pieces of Parkland Plastic side by side (hence the line down the middle). The size is around 120-130″ diagonal.
I also upgraded to the Ushio PS T15 lamp.
Here are a few of the standard LL pics. These were taken with a Sony Mavica (older one). With the standard Night setting. These haven’t been enhanced or changed other than re-sizing.


January 20, 2006
Upgraded to the Pro Reflector . I really didn’t notice a huge difference in brightness at first. But then I turned on the lights and WOW. The projector is actually Very watchable with 6- 40 watt flourescent lights on in the room.
Here’s a before and after photo.

Hard to tell with that photo huh. Let me try a Johnny Depp photo.

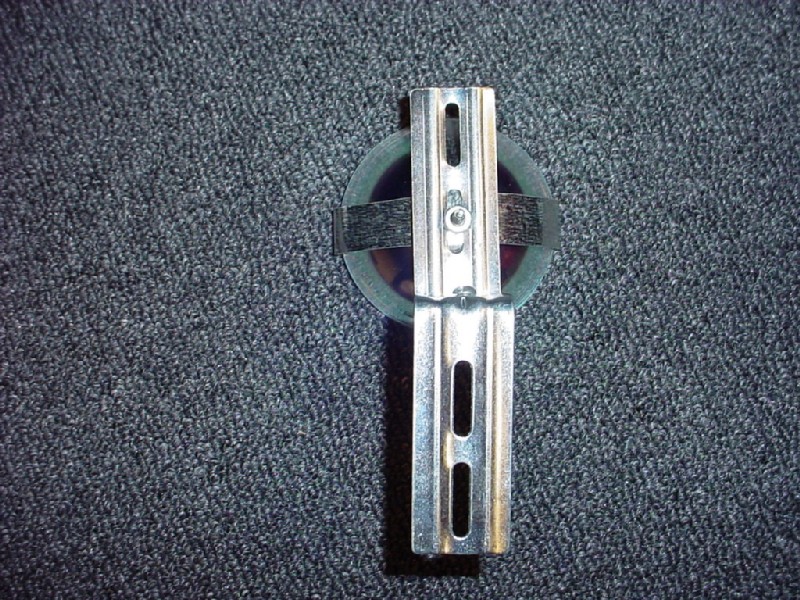
January 20, 2006


Here’s a few pics of how I mounted my Pro Reflector.


January 21, 2006
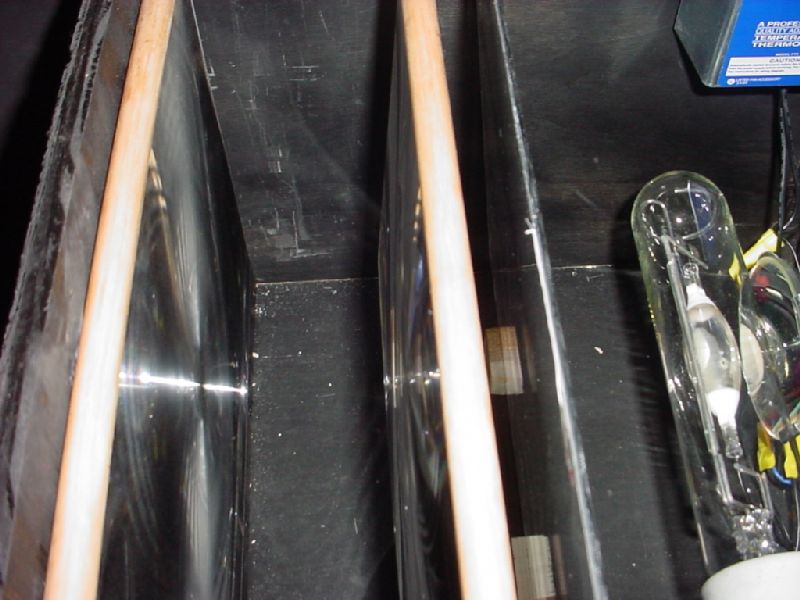
Upgraded to the Pro Lens and Fresnels.
Here’s a look at how I extended my Slusher box to fit the Pro lens:


And yes those are screws sticking out of the Pro Lens mounting holes. I didn’t have the right size screws and I was tired of going to the store so I figured I’ll replace them tomorrow.
January 23, 2006
Here’s a few of the inside and outside.
Still have to re-do the wiring a bit.


January 30, 2006
Finally got a good screen.
It’s a Da-Lite High Power 105″*144″
It is BEAUTIFUL !!! What a difference it makes. Much brighter and better colors and contrast. White is really white now.

My room is about 17′ by 24′ . With the projector all the way against the back wall it doesn’t quite fill up the whole screen left to right (about 8″ on each side) but it does fill it up top to bottom (8′ 4″ ceiling).
The corners might seem a little darker but it’s REALLY hard to notice. I think with a screen this big the eye and head have to pan from the corner to the middle so our eyes compensate for the brightness difference.
Also, there is no difference in brightness on different parts of the screen. And with the screen being almost as wide as the room there is no “viewing cone” that I can see. No matter where I sit or stand there is the same brightness everywhere. Even when sitting on the floor.
I think with the Pro Lens and the projector at the back of the room it really helps to eliminate “viewing cone” and keystone problems.
I highly recommend this screen to EVERYONE.
January 31, 2006
Here’s a before and after pic. Movies are totally watchable with 6-40 watt fluorescent lights on.
Some before and after with Lilu :
Before :

After:

Before:

After:

Pefect Dark Zero at 1080i —— 175″ Diagonal.

January 31, 2006
Well I made a few adjustments.
I moved the fresnels closer to the Lcd but further apart from each other. That helped to even out the light and eliminate some of the dark corners.
Then I cut off some of my focus box. It was 6″ long , now it’s 4″ long. I wanted to make sure it wasn’t blocking any light from the Pro Lens.
I then took the Lexan heat shield out.
Then I ran the projector for 7 hours while monitoring the heat. It stayed at around 105-110 degrees at the rear fresnel on the light side. On the Lcd side of the rear fresnel, it stayed at 88 degrees. The rear fresnel never bowed or warped. And the Lcd stayed at 78-80 degrees.
So I guess my cooling is sufficient to run this projector without the heat shield.
And it made quite a bit of difference. I would say about 15% better brightness. And the colors seem better also. Don’t know why but they do.
Febuary 2, 2006
Got the new meter in and did the Lux/Lumen test.
247 Lumens. This is with the 175″ diagonal screen with the projector 22′ from the screen.
I had it as high as 310 Lumens but it had slightly dim corners. Now the corners are very even and the entire screen is well lit.
And on daytime scenes, it’s a little bright. I need my new Lcd controller in so I can turn down the brightness a little.
Well, my theater room is almost complete so I thought I’d share a pic or two.
I need 2 longer cables to my box and then I can run the cables in the ceiling and hide them. And I have to clean up my “spare parts”.
I put in 18 theater chairs that I got from a flea market for $100. It took me and the family 3 hours to clean them, and then another 3 hours to cut paint and mount the bases for them. And then 1 hour to clean the paint of my boys.
Well here are the pics.


Febuary 9, 2006
I just purchased and received a NeuNeo HVD-2085 — 1080p upconverting Dvd Player.
It is HDCP free and upconverts to 1080p through component or HDMI !!!
With a 175″ Diagonal image you tend to notice any lack of sharpness and jaggies on the edge of objects in the movie you are watching, and with my Samsung 850 at 1080i I did notice that. Especially on movies that were recorded in lower resolutions.
But with this Dvd player at 1080p …. WOW !!!!
There is no blurring or edge jaggies. Everything is amazingly sharp and well-focused. It’s really incredible.
I did not know for sure that the 15.4″ Wuxga panel could do 1080p , but I’m sooooo glad I gave it a shot.
I’m enjoying this projector so much now I’ve almost lost the urge to tinker with it, well almost.
Some Star Wars Episode III … at 1080P


March 2, 2006
Well, my 5″ 457 lens came in today.
I noticed that I wasn’t capturing the whole lamp arc with the Pro Triplett, and since the 457 is almost an inch wider I decided to try it.
I built a new focus box for it and slid it in and was quite happy with it.
The image before was about 6″ shy of filling my whole 180″ screen. Now it completely fills it edge to edge. Also, the lux increased overall by about 15%. And now my corners aren’t as dim, and I can still get an excellent corner to corner focus.
The lens was 5.5″ outside diameter. 6″ long and huge !!!
Here was the description as given to me :
The 457mm triplets come from Opaque Projector. They are 5 inches in diameter and 157mm long.
Pics as compared to the Pro lens :


Perfect Dark Zero :

Fantastic 4 :


June 27, 2006
Total build cost for this projector was :
15.4″ Wuxga LCD – $250 — Ebay
15.4″ Controller – $375 — Minoten
LL Light Kit – $180 — LL
LL Pro lens kit – $260 —- LL Have since switched to an 18″-$45
LL Pro Reflector $20 — LL
Slusher Box – $110 — Slusher
Fans – $40 — Radio Shack
Misc parts – $100 — Lowes
Total – $1335
Then if you want to add more:
Dalite Screen – $650 — www.finalclick.com
1080p Dvd Player – $200 — www.neodigits.com
Xbox 360 / Accssories – $650
Theater Room – $1800
Klipsch/Yamaha 5.1 Surround – $1800 — Ebay
Xbox 360 HD-DVD – $199